Honey Danish
These delicious Honey Danish pastries combine light, buttery swirled pastry with juicy sultanas and a delicate coating of sticky honey. Baked together in a 12-portion tray, the pastries expand until they touch, creating a wonderfully inviting golden bake. They are perfect served warm with coffee or tea.
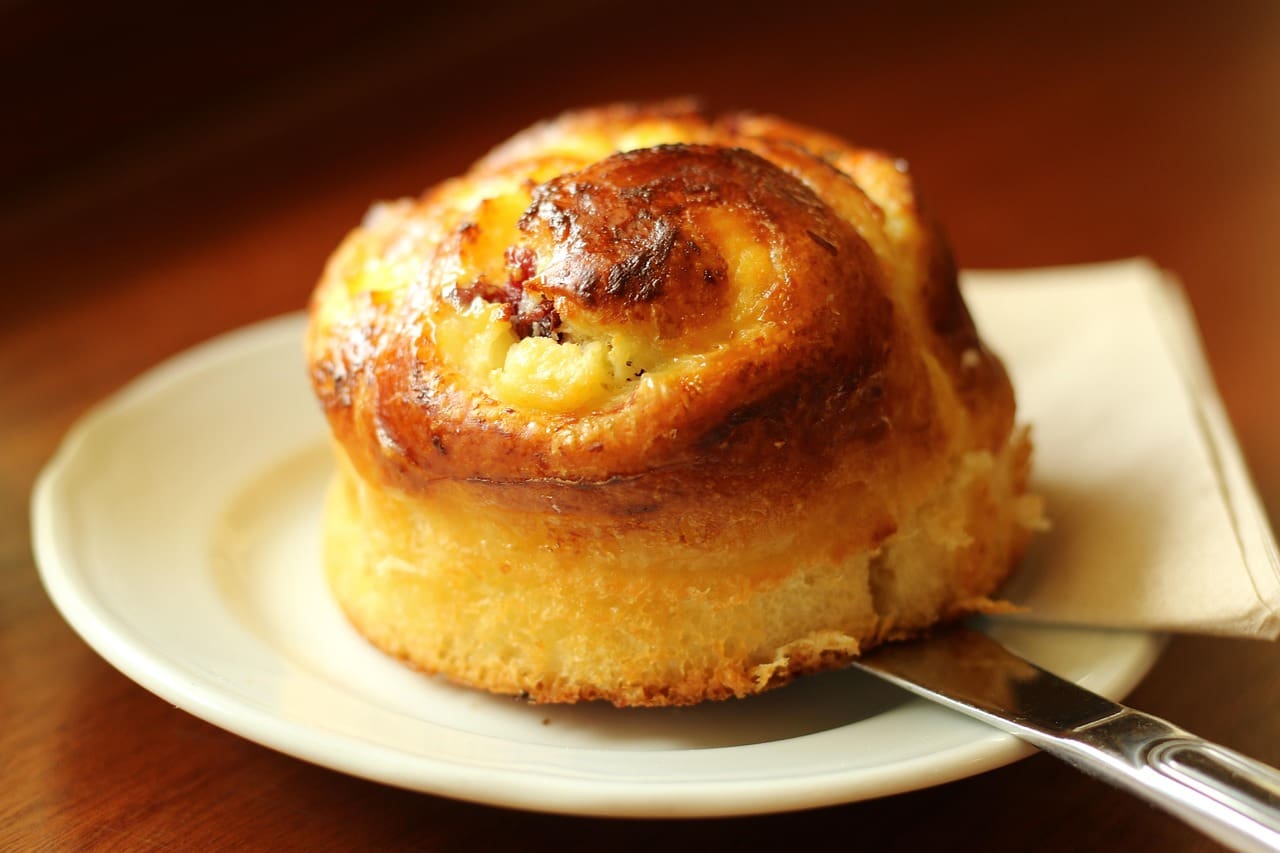
These delicious Honey Danish pastries combine light, buttery swirled pastry with juicy sultanas and a delicate coating of sticky honey. Baked together in a 12-portion tray, the pastries expand until they touch, creating a wonderfully inviting golden bake. They are perfect served warm with coffee or tea.
Servings 12 Honey Danish
Ingredients
Danish Pastry Ingredients:
- 500 g strong white bread flour
- 7 g fast-action dried yeast
- 50 g caster sugar
- ½ tsp salt
- 250 ml warm milk
- 1 large egg
- 50 g unsalted butter melted
- 1 tsp vanilla extract
- 1 large egg beaten, for brushing
Filling Ingredients:
- 75 g unsalted butter softened
- 60 g soft brown sugar
- 1 tsp ground cinnamon
- 100 g sultanas
Honey Topping Ingredients:
- 4 tbsp clear honey
- 1 tbsp water warm
Instructions
Making the Dough:
- Place the flour in a large mixing bowl and add the yeast, caster sugar and salt. Keep the salt and yeast separated initially.500 g strong white bread flour, 7 g fast-action dried yeast, 50 g caster sugar, ½ tsp salt
- Make a well in the centre and pour in the warm milk. Add the egg, melted butter and vanilla extract.250 ml warm milk, 1 large egg, 50 g unsalted butter, 1 tsp vanilla extract
- Mix everything together until a soft dough forms.
- Turn the dough onto a lightly floured surface and knead for approximately 8–10 minutes. The dough should become smooth, soft and slightly elastic.
- Alternatively, use a stand mixer fitted with a dough hook and knead for around 6–8 minutes.
- Place the dough into a lightly greased bowl. Cover with a clean tea towel or cling film and leave somewhere warm for approximately 1–1½ hours.
- The dough should become noticeably larger and roughly double in size.
Preparing the Filling:
- While the dough rises, place the softened butter into a small bowl.75 g unsalted butter
- Add the brown sugar and cinnamon, then mix until you have a soft, spreadable paste.60 g soft brown sugar, 1 tsp ground cinnamon
- Set aside until needed.
Roll Out the Dough:
- Once the dough has risen, gently knock it back to remove some of the excess air.
- Place it onto a lightly floured surface and roll it into a large rectangle, approximately 40cm × 30cm.
- Don't worry if the measurements are not exact. The important thing is to create a reasonably even rectangle that will allow you to form plenty of lovely layers.
- Spread the cinnamon butter mixture evenly across the surface.
- Scatter the sultanas over the top, distributing them as evenly as possible.100 g sultanas
Create the Swirl:
- Starting from one of the longer edges, roll the dough tightly into a sausage shape.
- Take your time here because a reasonably tight roll helps create those attractive pastry spirals.
- Once rolled, use a sharp knife to cut the dough into 12 approximately equal portions.
- Each piece should reveal a beautiful spiral of pastry, cinnamon filling and sultanas.
Arrange in the Tray:
- Place each spiral into your 12-portion baking tray.
- Leave a little space between each one. They may look rather lonely at this stage, but don't worry.
- As they rise and bake, the pastries will expand and eventually touch each other.
- This is part of what makes the finished Honey Danish so appealing.
- Cover the tray loosely and leave the pastries to prove for another 30–45 minutes.
Brush with Egg:
- Preheat the oven to 180°C fan / 200°C conventional / Gas Mark 6.
- Once the pastries have puffed up, gently brush the exposed pastry with beaten egg.1 large egg
- Try to avoid flooding the spaces between the pastries because you want the golden colour to develop mainly across the tops.
Bake:
- Place the tray into the preheated oven and bake for approximately 20–25 minutes.
- The pastries should become beautifully golden brown.
- As they bake, watch the individual swirls expand towards one another. Before long, they should be touching around their edges, creating that wonderfully tempting tray of golden pastry.
- If the tops begin browning too quickly, loosely cover the tray with foil for the final few minutes.
Add the Honey:
- While the Danish pastries are baking, gently warm the honey with the tablespoon of warm water.4 tbsp clear honey, 1 tbsp water
- You don't need to boil it. The aim is simply to loosen the honey so that it becomes easy to brush.
- Remove the pastries from the oven when they are golden and cooked through.
- While they are still warm, brush the honey mixture generously over the tops.
- The honey will soak into the warm pastry slightly while leaving a beautiful glossy, sticky coating across the surface.
- This is the moment when they become particularly difficult to resist.
Cool and Serve:
- Allow the Honey Danish to cool in the tray for approximately 10 minutes.
- Carefully transfer them to a wire rack, although you can also leave them together in the tray for a more rustic presentation.
- Serve warm or allow them to cool completely.
- For the ultimate cake-fanatic experience, enjoy one while still slightly warm with a freshly brewed cup of coffee.
Equipment
- wooden spoon or dough scraper
- Baking Tray 12-portion or individual Danish pastry tray
Notes
Serving Ideas:
These Danish pastries are wonderful served simply, but there are plenty of ways to make them even more indulgent.
Serve warm with coffee or tea.
Add a little extra honey just before serving.
Serve with a spoonful of lightly whipped cream.
Pair with fresh berries for a fruity contrast.
Warm gently and serve with vanilla ice cream for a more decadent dessert.
Dust very lightly with icing sugar once cooled.
Cook's Tips:
Don't rush the rising: The dough needs time to become light and airy. A warm, draught-free place is ideal.
Keep the filling even: Spread the cinnamon butter right to the edges, but don't apply it excessively thickly. Too much filling can make the pastry difficult to roll.
Roll firmly: A reasonably tight roll gives you much more attractive swirls and helps keep the filling where it belongs.
Don't worry when they touch: The pastries are supposed to expand into one another. This gives the finished tray its distinctive appearance and creates deliciously soft edges where the pastries meet.
Add the honey while warm: Brushing the honey over freshly baked Danish allows it to soak into the surface while creating that lovely sticky glaze.
Watch the sultanas: If any sultanas are sitting right on the surface, they can darken quickly during baking. Tucking them slightly into the filling helps prevent them from catching.
Storage:
Store completely cooled Danish pastries in an airtight container at room temperature for up to 2 days.
They are best enjoyed fresh, but you can gently warm them in the oven before serving to restore some of their softness.
They can also be frozen once completely cooled. Wrap them individually and place them in a suitable freezer container for up to 2 months. Thaw thoroughly before gently reheating.
If you want, I can also produce 19 natural-sounding reviews for the Honey Danish, using your usual format of no star ratings, no numbering and no empty lines between reviews.
Nutrition
Calories: 333kcal | Carbohydrates: 53g | Protein: 7g | Fat: 11g | Saturated Fat: 6g | Polyunsaturated Fat: 1g | Monounsaturated Fat: 3g | Trans Fat: 0.3g | Cholesterol: 56mg | Sodium: 122mg | Potassium: 162mg | Fiber: 1g | Sugar: 21g | Vitamin A: 341IU | Vitamin C: 0.3mg | Calcium: 51mg | Iron: 1mg
