Baking your own homemade bread rolls fills the kitchen with a wonderful aroma that’s up there with fried bacon, roast lamb or onions and garlic frying. The process is humble, the ingredients are simple, and the results? Absolutely heart warming. Whether you’re serving them fresh with butter, pairing them with soup, or using them to mop up a hearty stew, homemade bread rolls elevate the meal in a way store-bought never quite can.
I’ve always found bread baking a bit like gardening—it requires patience, a gentle touch, and a little bit of trust in nature (in this case, yeast). And once you’ve baked your own rolls, it’s hard to go back. The aroma that fills the kitchen alone is reason enough to give it a go.
My first foray into bread rolls happened almost by accident. I was trying to make a loaf, got the dough wrong, and decided to split it into little rounds instead. Out came these imperfect, golden cushions that disappeared faster than I could say “pass the butter.” From then on, I was hooked.
What I love most about making bread rolls is their versatility. You can keep them plain and soft for breakfast, sprinkle them with seeds or herbs for a savoury twist, or even make them slightly sweet with a touch of honey or cinnamon. They’re freezer-friendly, lunchbox-approved, and perfect for gatherings. I’ve even served them as mini sandwich buns for parties, and they’ve always been a hit.
Now, don’t let the idea of kneading and rising put you off. Bread rolls don’t demand fancy equipment—just a good bit of elbow grease (or a stand mixer if you’ve got one) and a warm spot in the house. I usually tuck my dough bowl near the radiator or even in the oven with just the light on. It’s amazing how that quiet little dough ball doubles in size when given the right conditions.
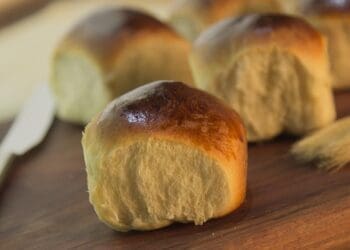
As for shaping, don’t stress about perfection. Rustic is charming! Whether they end up round, oval, or slightly lopsided, they’ll still taste delicious. And there’s a real joy in seeing a tray of rolls puff up and brown in the oven, like little edible clouds.
Here’s what you’ll need for a basic batch:
Simple Ingredients:
- Strong white bread flour
- Warm water
- Yeast (active dry or instant)
- Sugar
- Salt
- Olive oil or softened butter
That’s it! From there, you can add your own touch—maybe a sprinkle of sesame seeds on top, or a little garlic butter brushed on after baking.
If you’ve never tried baking bread rolls at home, I can’t recommend it enough. It’s a small act of kitchen magic that brings big rewards. And the best part? You’ll never again need to panic when you realise you’ve run out of bread—just make your own.
Using Whole Wheat
Using whole wheat flour is a great way to make homemade bread rolls a bit healthier—it adds more fibre, nutrients, and a lovely nutty flavour. However, whole wheat flour behaves a bit differently from white bread flour, so here are a few simple adjustments to help you get the best results:
1. Use a Mix of Whole Wheat and White Flour
Whole wheat flour is heavier and absorbs more liquid. To keep the rolls soft and not too dense, start with a 50/50 mix of whole wheat flour and strong white bread flour. As you get used to the texture, you can gradually increase the whole wheat content to 75% or even 100% if you like a heartier roll.
2. Add More Liquid
Whole wheat flour soaks up more water. Add about 1–2 tablespoons extra warm water (or milk, if your original recipe uses that) to keep the dough from drying out. The dough should feel slightly tacky but not overly sticky.
3. Let It Rest Longer
Whole wheat flour benefits from a slightly longer first rise—around 90 minutes instead of 60. This gives the dough more time to develop gluten and soften the wheat bran, making the rolls less chewy and more tender.
4. Use a Bit More Yeast
To help the dough rise well with the heavier flour, increase your yeast slightly. If the original recipe uses 7g (1 packet), try using about 9–10g.
5. Add a Touch of Honey or Maple Syrup
Whole wheat can have a more robust, earthy taste. Adding a teaspoon of honey or maple syrup not only balances the flavour but also helps feed the yeast for a better rise.
6. Include a Spoonful of Olive Oil or Butter
A little fat (if not already in the recipe) improves the texture and keeps the rolls from becoming too dry.
7. Don’t Over-Knead
Whole wheat dough doesn’t need quite as much kneading as white dough—around 6–8 minutes by hand should be plenty. Over-kneading can actually make it tougher.
With these adjustments, you’ll still enjoy fluffy, delicious rolls—with a wholesome, nutty twist that’s just as satisfying. And if you want to go even further, try adding flaxseeds, sunflower seeds, or oats for extra texture and nutrition.
Homemade Bread Rolls
Ingredients
- 500 g strong white bread flour
- 7 g instant yeast (1 sachet)
- 1 ½ tsp fine sea salt
- 1 tbsp granulated sugar
- 300 ml warm water about 40 °C
- 2 tbsp olive oil plus extra for greasing
Instructions
- In a large bowl, whisk together the flour, yeast, sugar and salt.500 g strong white bread flour, 7 g instant yeast, 1 ½ tsp fine sea salt, 1 tbsp granulated sugar
- Pour in the warm water and olive oil. Mix with a wooden spoon until a shaggy dough forms. Turn out onto a lightly floured surface and knead for 8–10 minutes until smooth and elastic (or use a stand mixer with the dough hook on medium speed for 6–7 minutes).300 ml warm water, 2 tbsp olive oil
- Lightly oil a clean bowl and place the dough inside, turning once to coat. Cover with a clean tea towel or lightly greased clingfilm and leave in a warm spot for 60–75 minutes, or until doubled in size.
- Gently deflate the dough and divide into 12 equal pieces (each about 65 g). Shape each piece into a tight ball by tucking the edges underneath and rolling on the work surface.
- Line a baking tray with parchment paper and place the rolls about 3 cm apart. Cover loosely and leave to rest for 15–20 minutes until noticeably puffy.
- Preheat the oven to 200 °C (fan 180 °C/gas mark 6). If you like, brush the tops of the rolls with a little milk or beaten egg for extra shine. Bake for 15–20 minutes until golden brown on top and sounding hollow when tapped underneath.
- Transfer to a wire rack and cool for at least 10 minutes before serving.
5 comments
The dough was straightforward to knead, and the end result was bakery-quality
Soft, golden and utterly moreish—my kids insisted on an extra one each.
As someone who once thought baking was beyond me, these rolls were a revelation.
These pillowy rolls were the perfect accompaniment to my spicy lentil soup.
Easy to follow and such a treat to pull warm from the oven.